Bucket Versioning
Introduction
Cost Consideration: Each version of an object is stored as a complete copy, not just differences. If you have 3 versions of a file, you pay for 3 complete files. AWS charges normal S3 rates for every version stored and transferred. Consider using lifecycle policies to manage old versions.
What is S3 Versioning?
Versioning in Amazon S3 is a feature that allows you to keep multiple variants of an object in the same bucket. With versioning enabled, you can preserve, retrieve, and restore every version of every object stored in your bucket, providing an additional layer of data protection against accidental deletion or modification.
Key Benefits of Versioning
- Data Protection: Protects against accidental overwrites and deletions
- Change Tracking: Maintain a complete history of object modifications
- Easy Recovery: Quickly restore previous versions when needed
- Compliance: Meet regulatory requirements for data retention
- Collaboration: Multiple users can work on the same objects safely
How Versioning Works
When versioning is enabled on a bucket:
- Each object gets a unique version ID
- New uploads create new versions rather than overwriting existing objects
- Previous versions remain accessible and can be retrieved at any time
- Delete operations create a “delete marker” rather than permanently removing the object
Versioning States
S3 buckets can be in one of three versioning states:
- Unversioned (default): No versioning, objects can be overwritten
- Versioning-enabled: New versions are created for each upload
- Versioning-suspended: No new versions created, but existing versions remain
Best Practices
-
Use Lifecycle Policies: Automatically delete old versions after a specified time
-
Monitor Costs: Versioning can significantly increase storage costs
-
MFA Delete: Enable MFA Delete for additional security on version deletion
-
Cross-Region Replication: Replicate versions across regions for disaster recovery
-
You can use the S3 Versioning feature to preserve, retrieve, and restore every version of every object stored in your buckets.
-
With versioning you can recover more easily from both unintended user actions and application failures, Versioning-enabled buckets can help you recover objects from accidental deletion or overwrite
-
After versioning is enabled for a bucket, if Amazon S3 receives multiple write requests for the same object simultaneously, it stores all of those objects.
-
Enable Bucket Versioning feature
-
In the S3 bucket interface, select bucket name
aws-first-cloud-journey -
Select Properties, in Bucket Versioning, select Edit
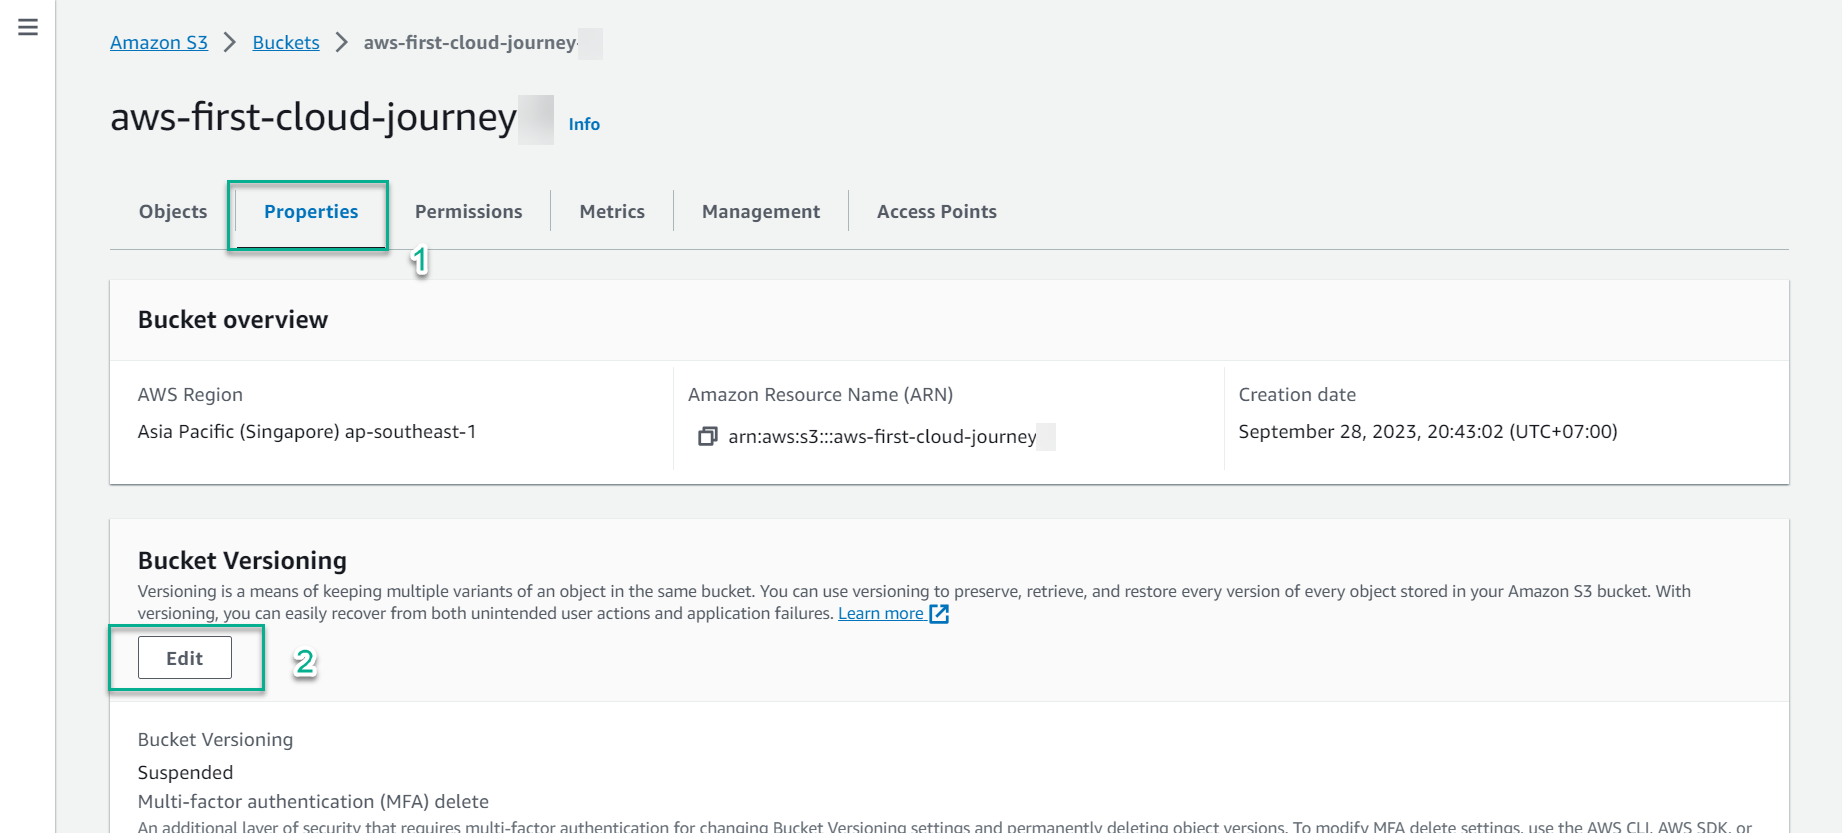
- In the Bucket Versioning section, select Enable, select Save changes

-
-
Change the content on the file index.html
-
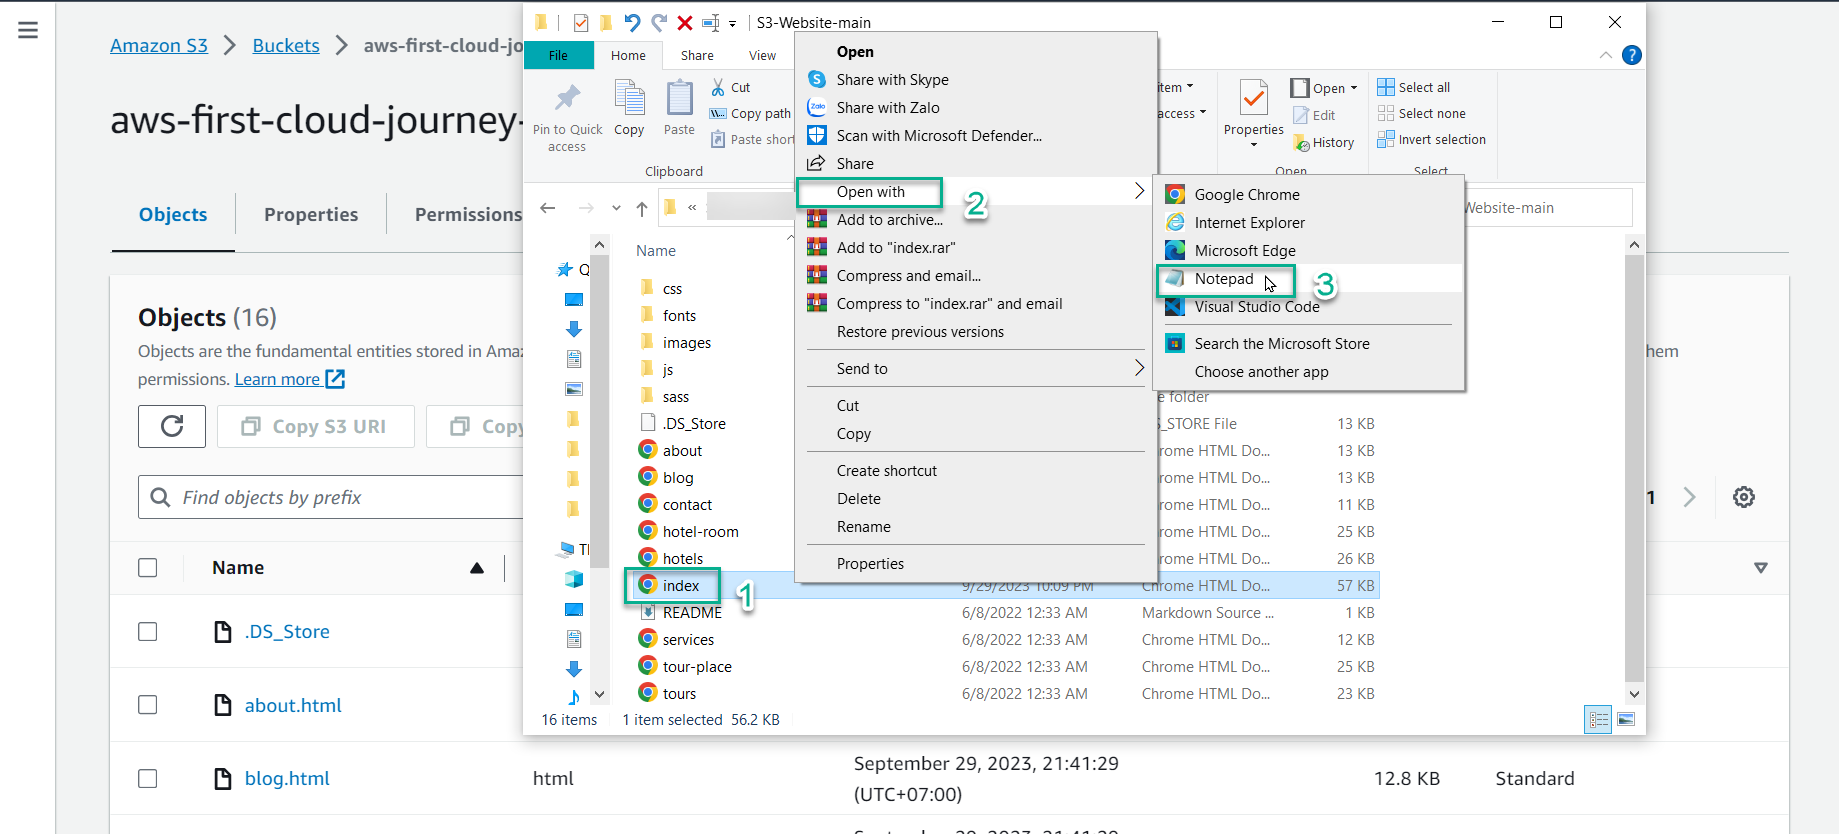
Open the window containing the folders, files downloaded and extracted in lab 2.2
-
Select file index.html -> right click -> select Open with -> select Notepad
-
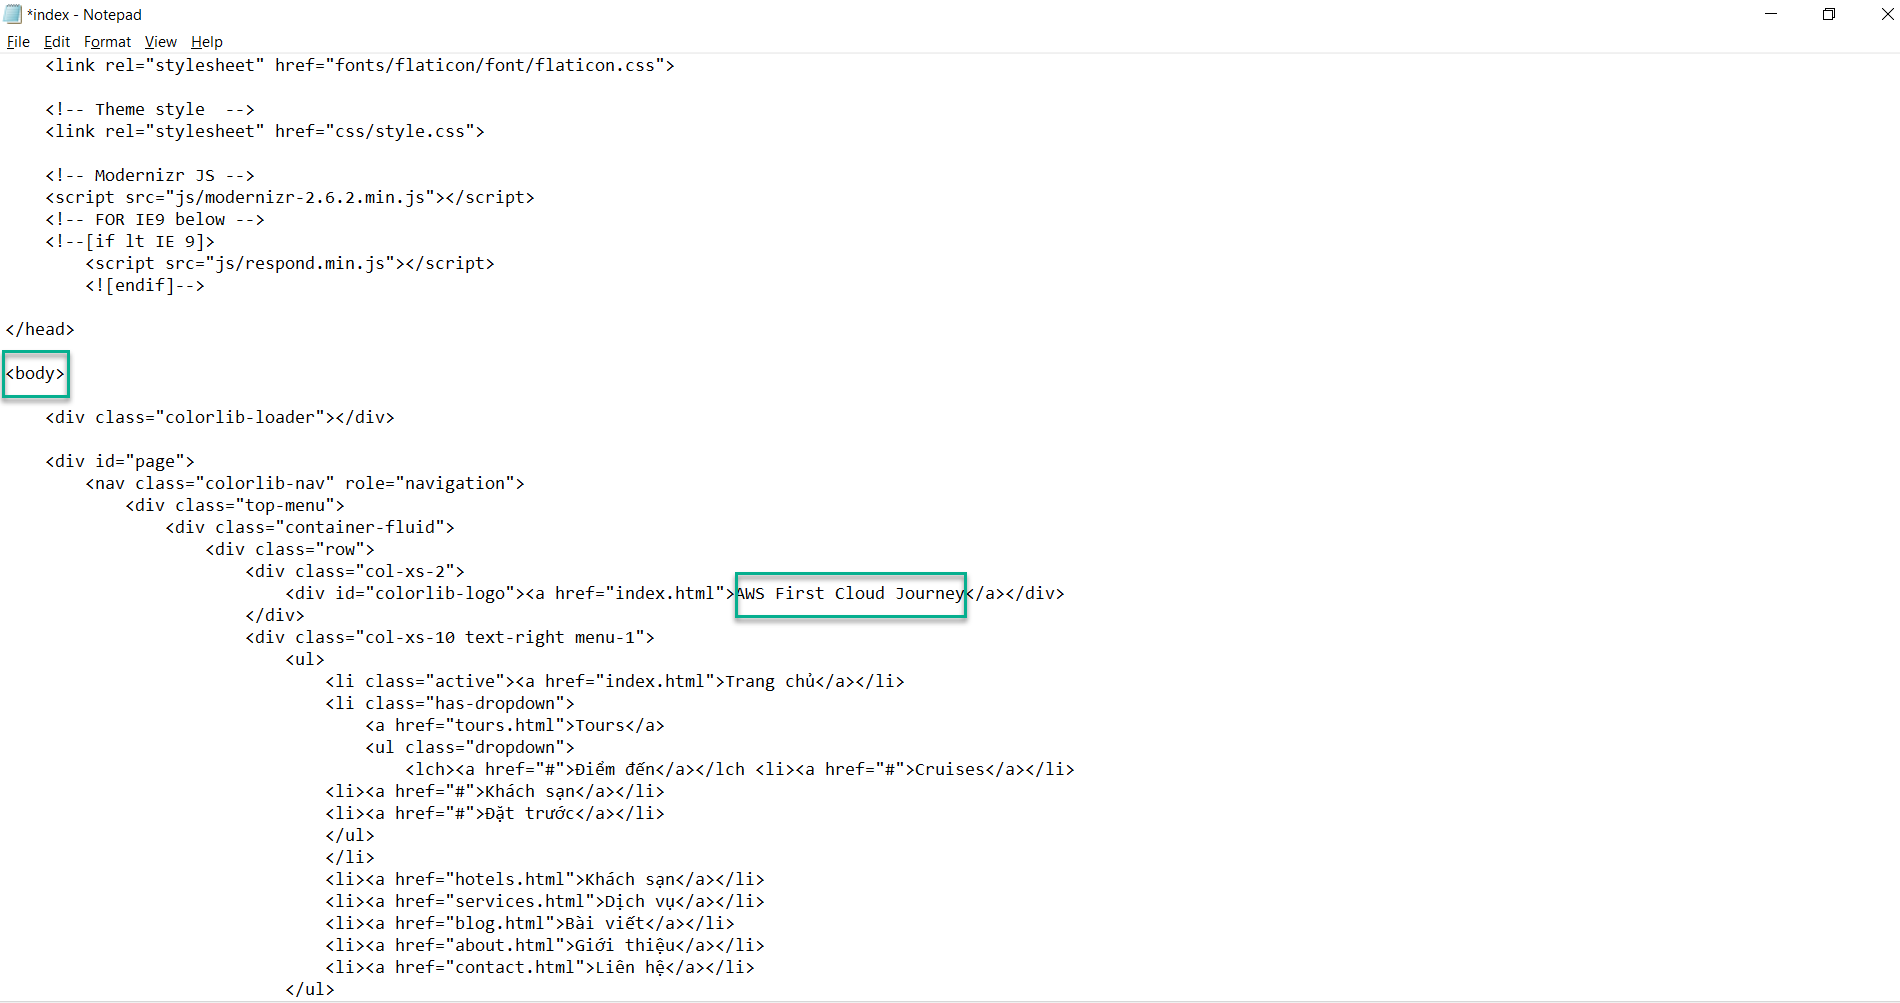
Scroll down to the middle of the page, at tag body, replace the value AWS First Cloud Journey with something else, for example:
LEARNING CLOUD ^^ LEARNING FUN <3 -
Before editing:
- After editing:
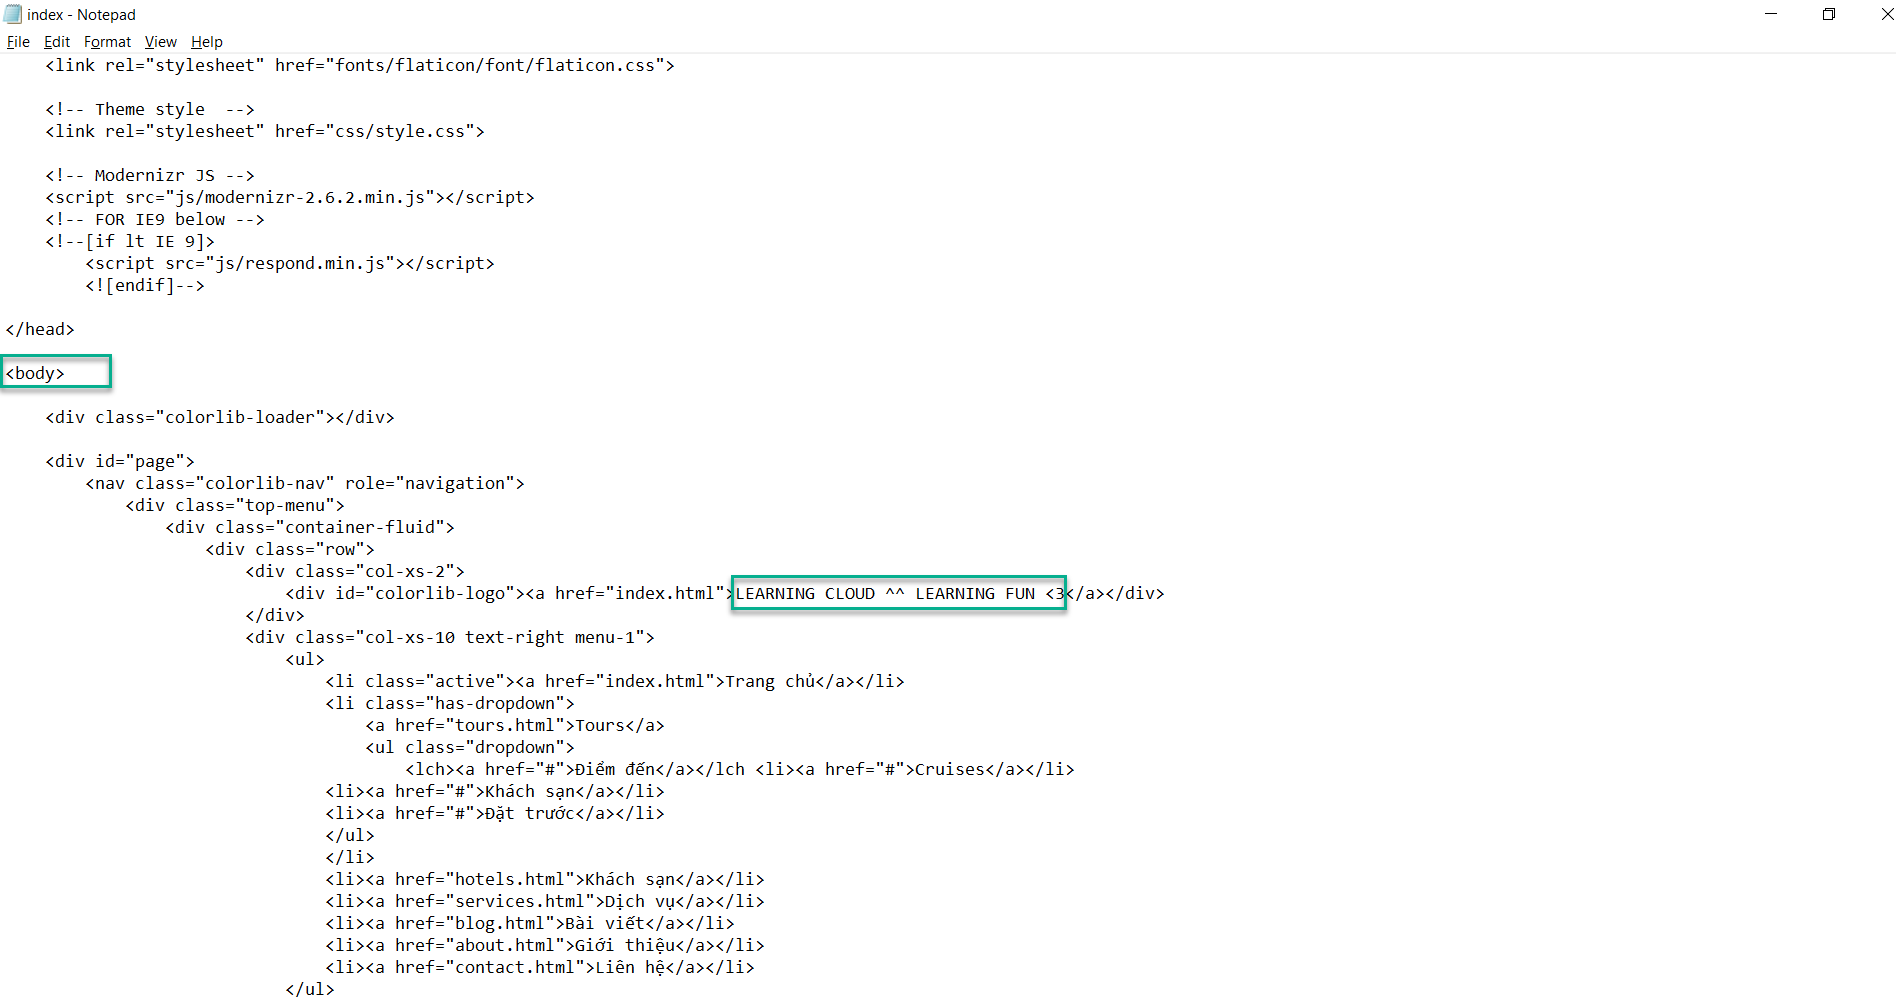
- Press the key combination: Ctrl and S to save the edited content in the index.html file
-
-
Test versioning feature on S3
-
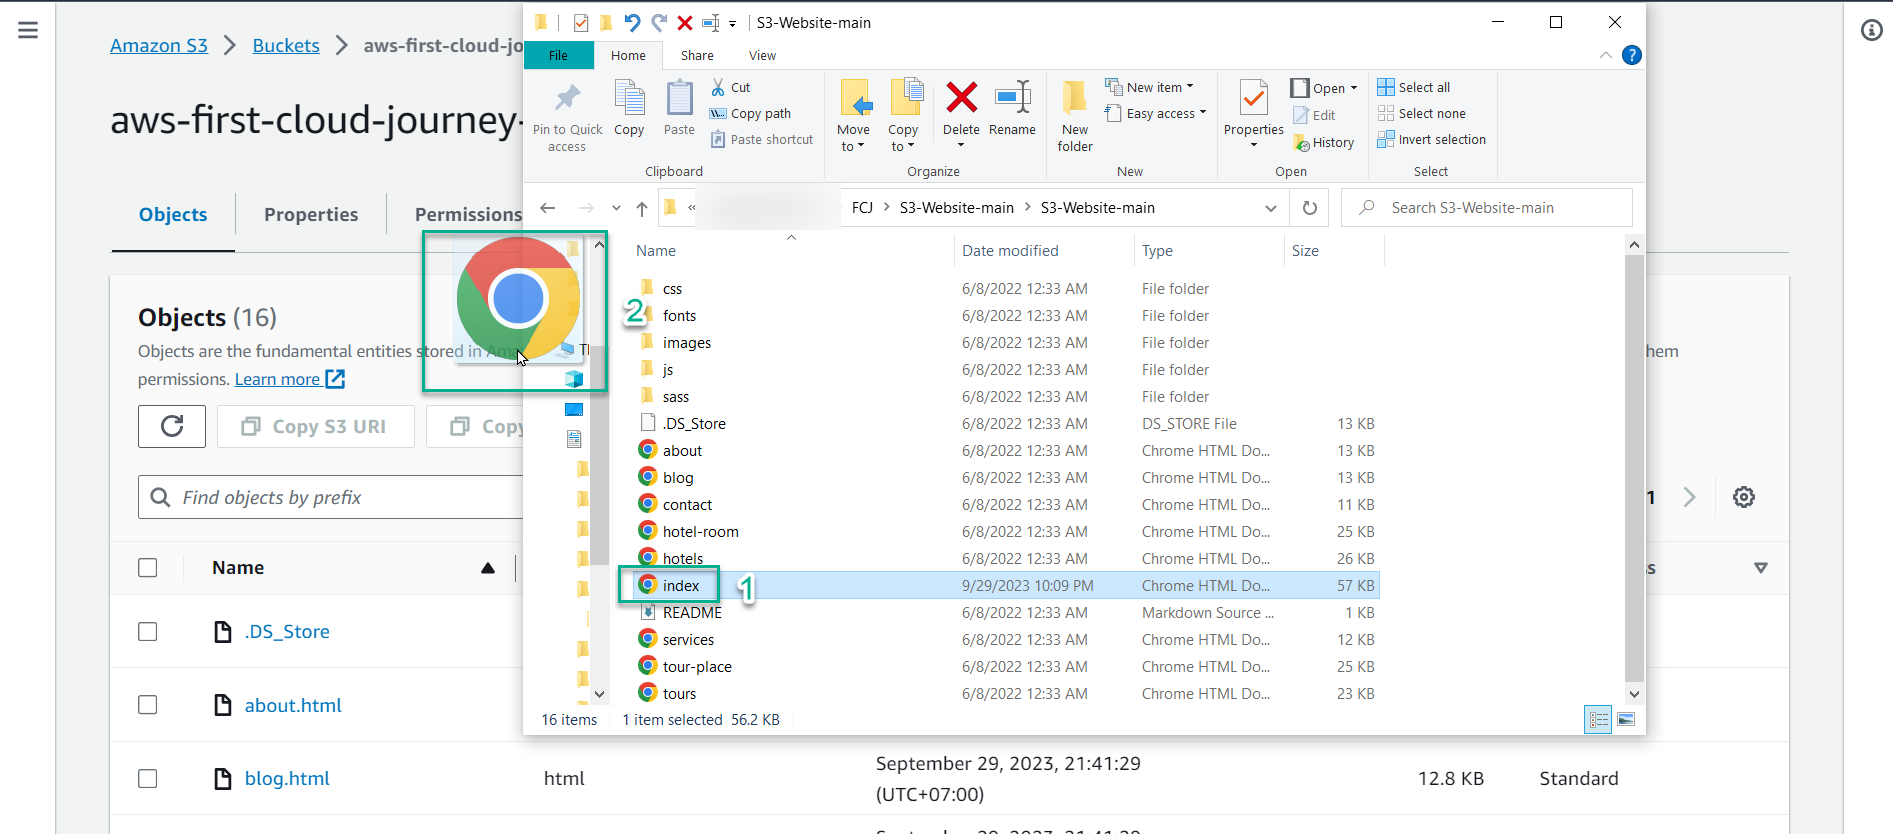
At the S3 bucket interface AWS First Cloud Journey, select Upload
-
Upload the newly edited index.html file into the AWS First Cloud Journey bucket by dragging and dropping
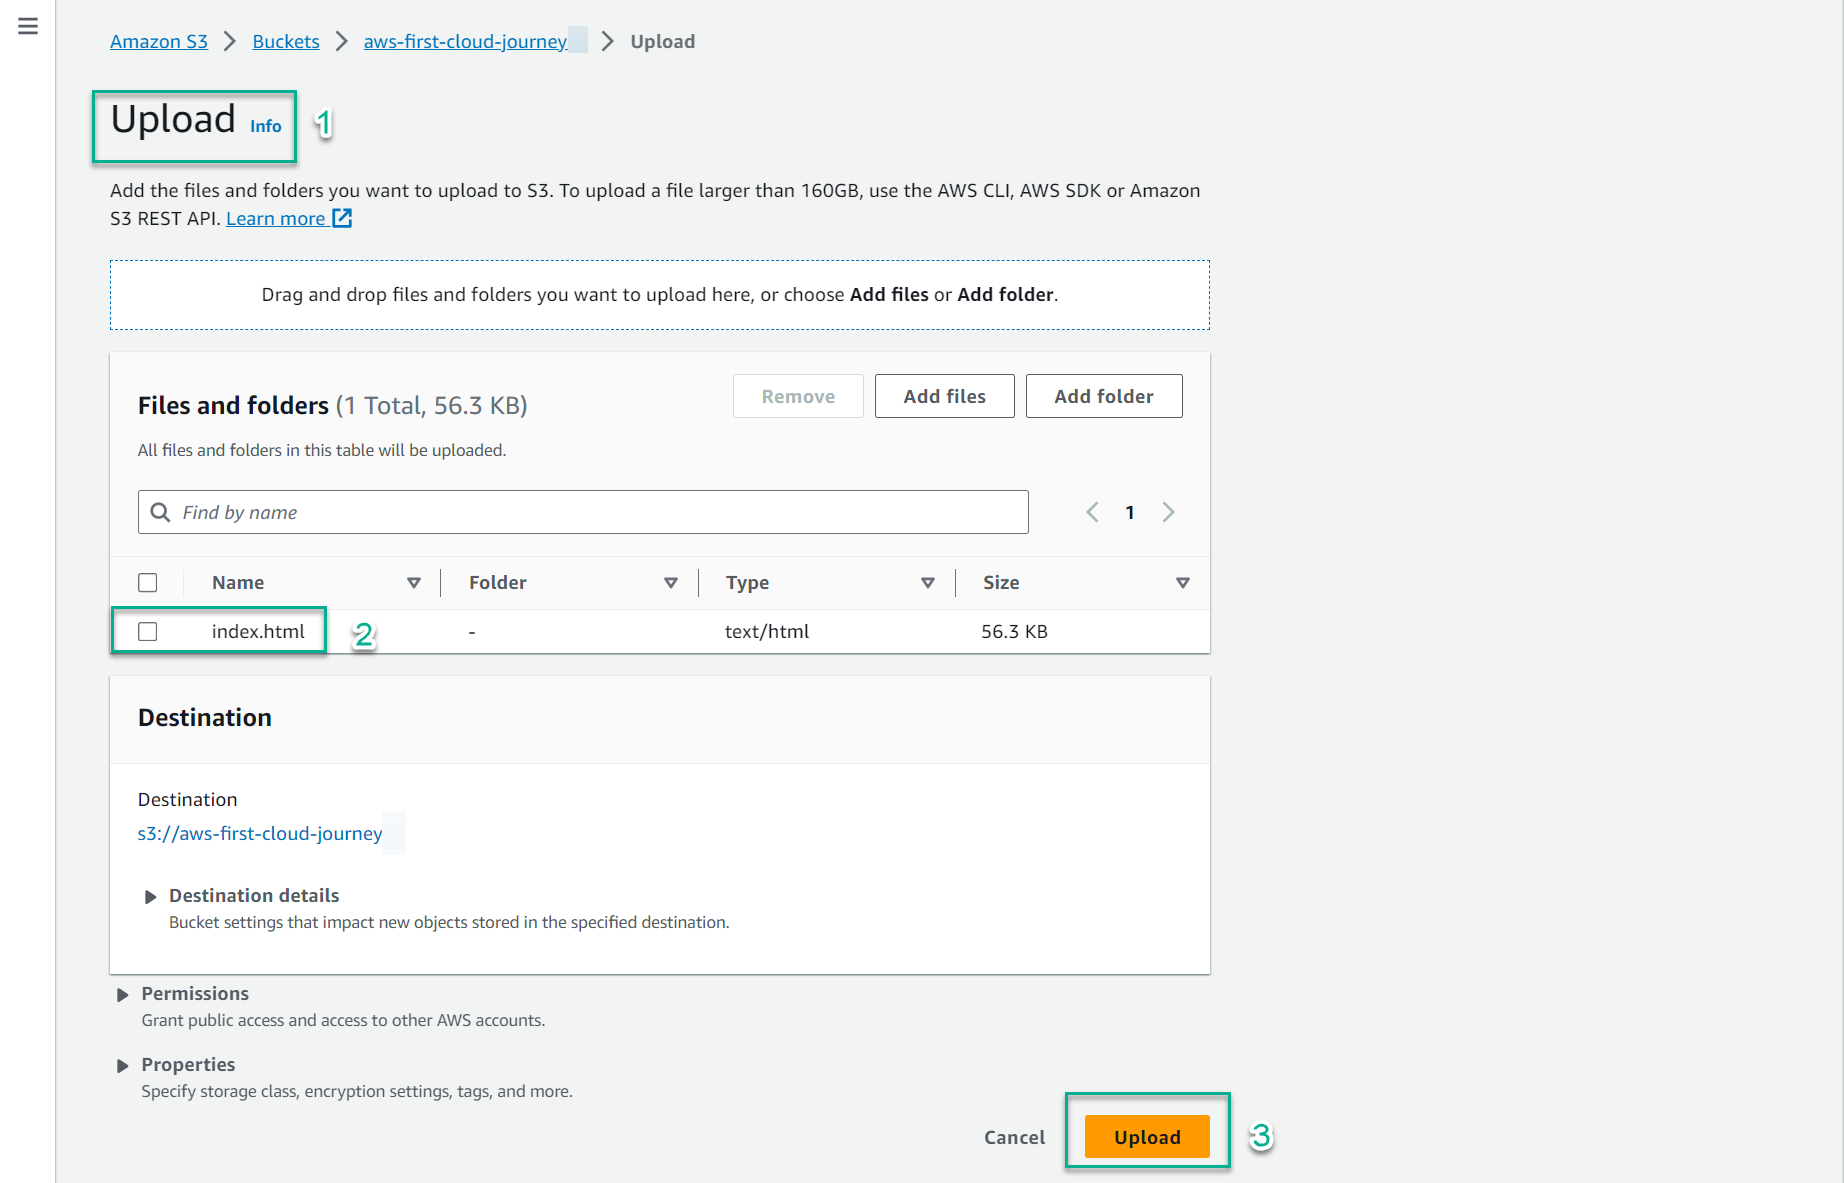
- At the Upload interface, index.html file in the Files and folders section, scroll to the bottom of the page and select Upload
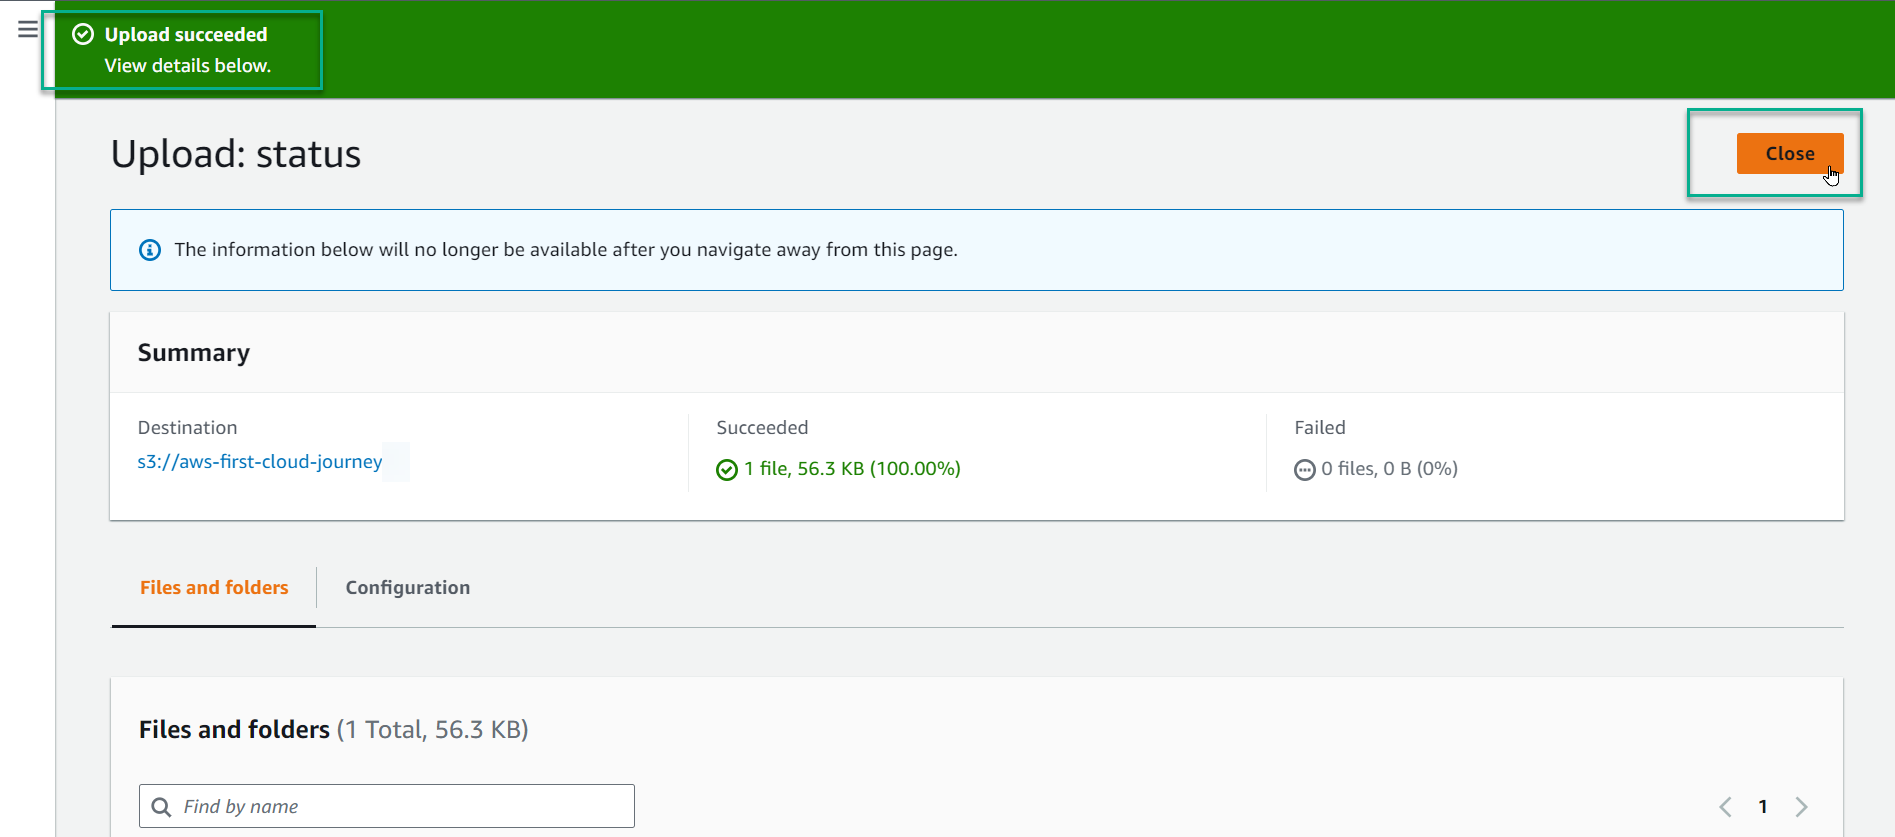
- The upload file has been completed, select Close to return to the bucket interface
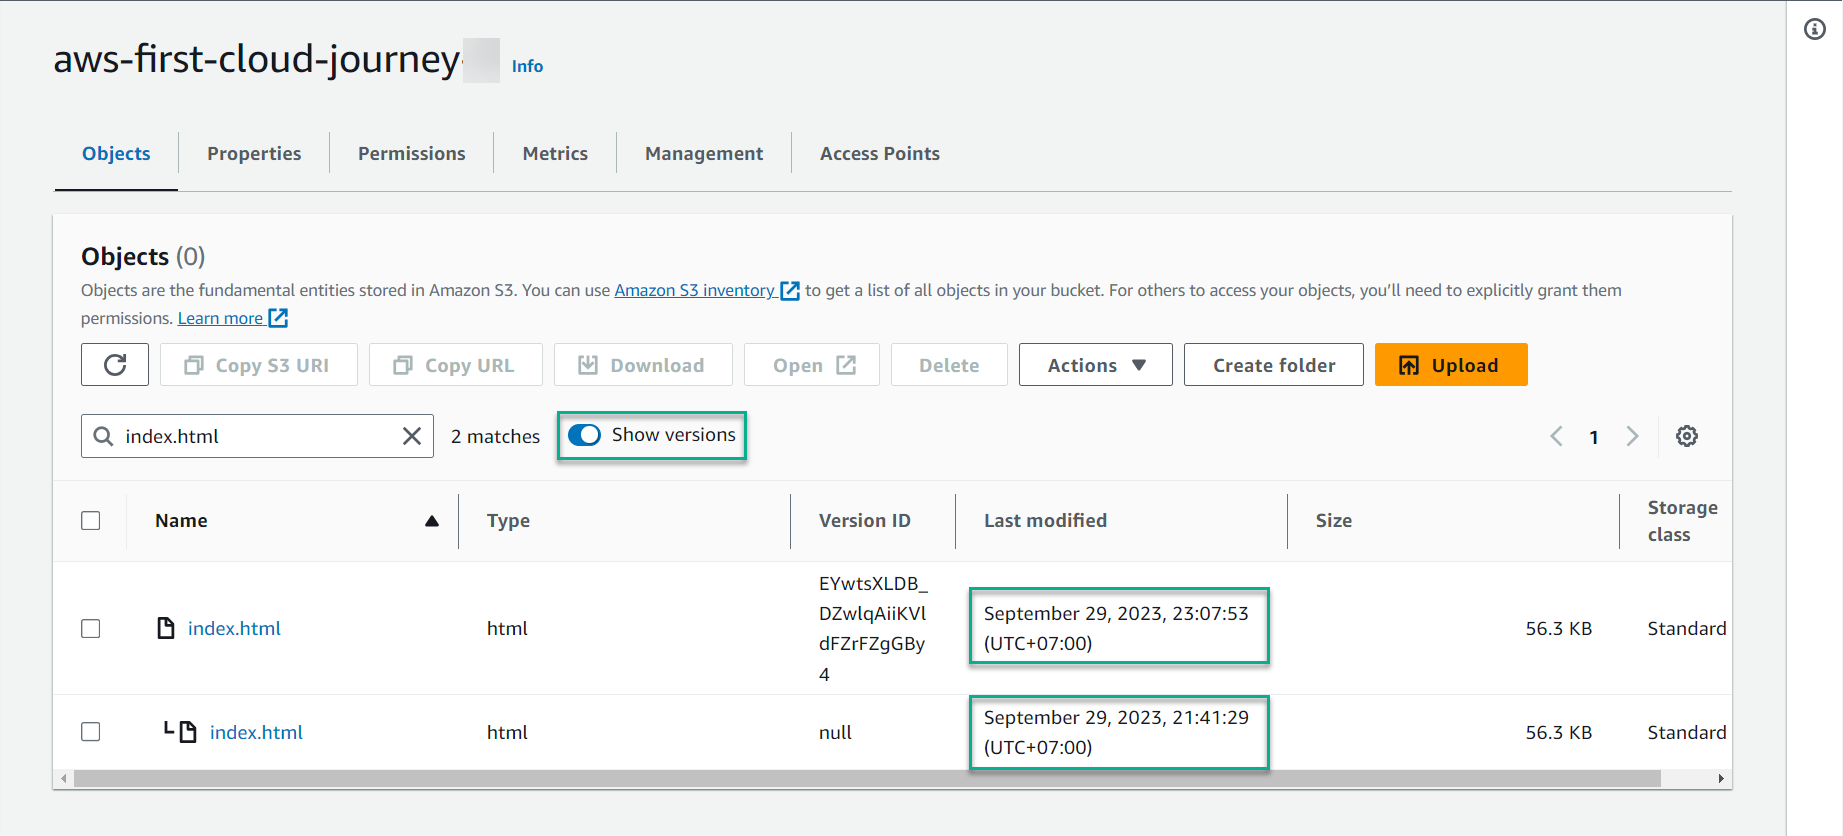
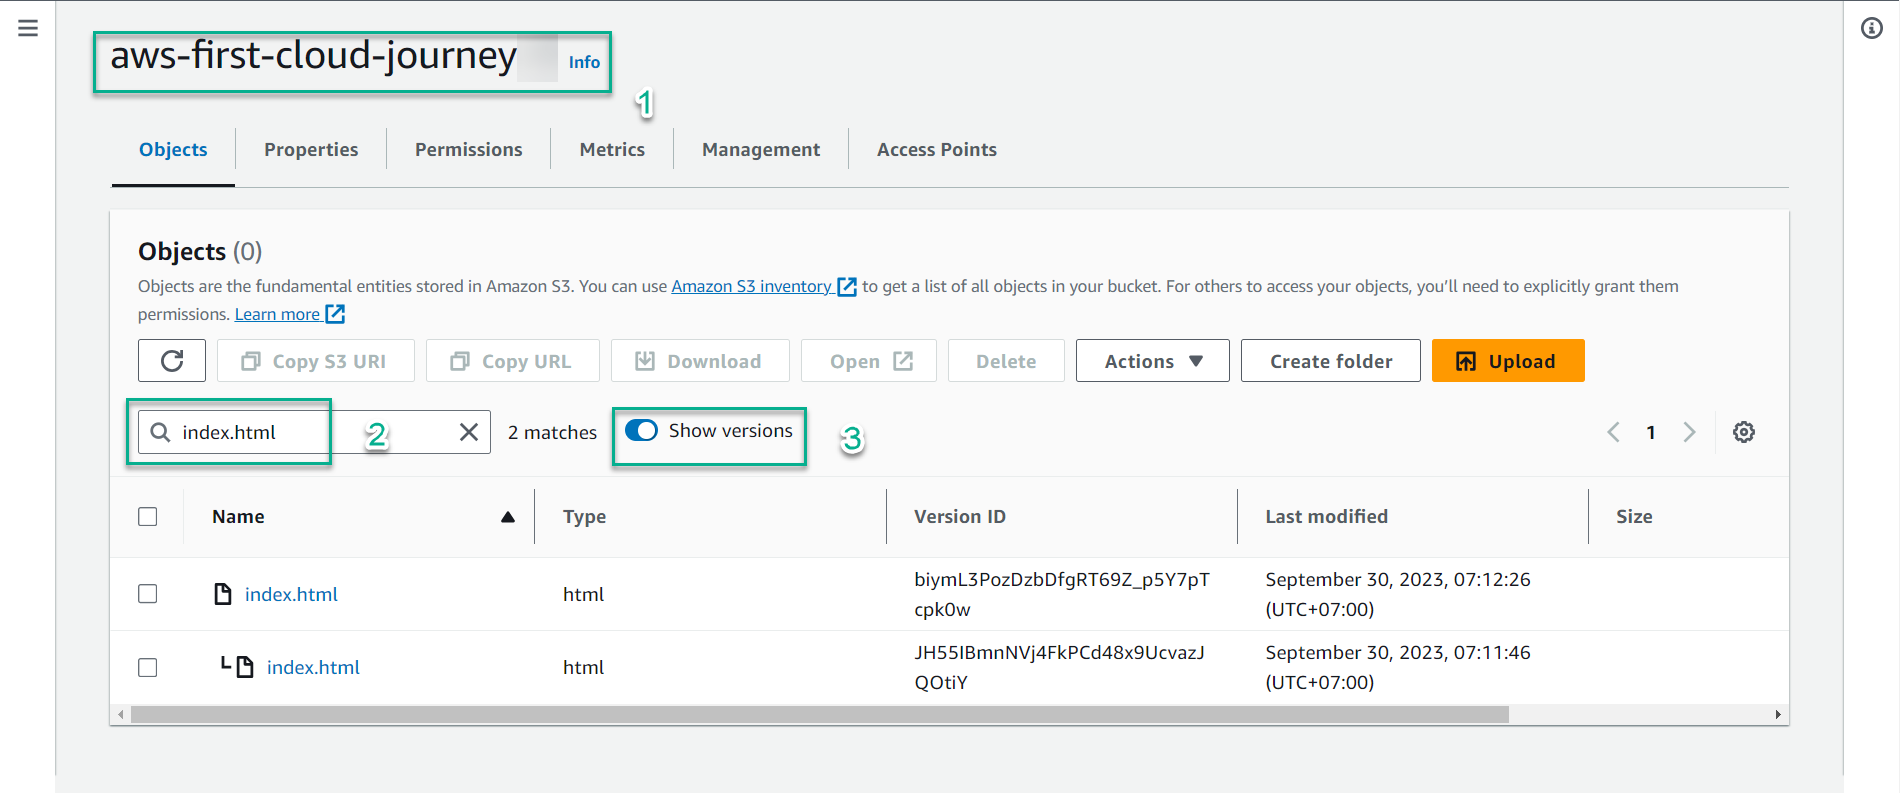
- In the search box, type
index.htmland press enter. You will see that the bucket only displays one object. Move the circle button of Show versions from left to right to see the version of the file.
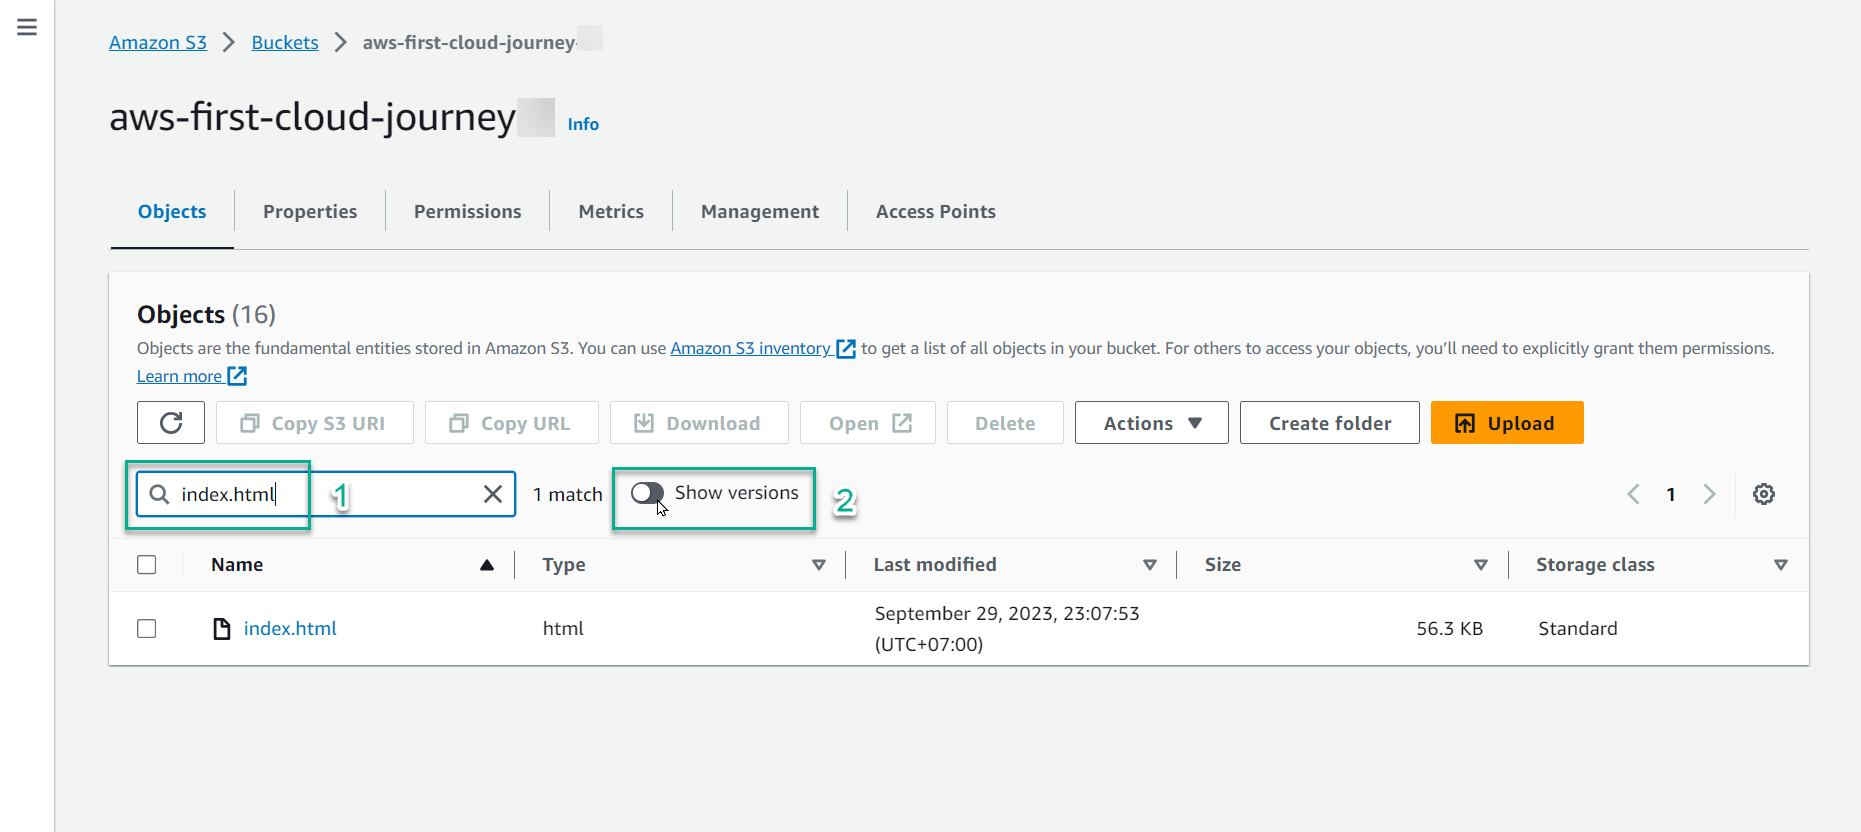
- Now you see there are 2 index.html files, with the modification time of the object above being closer to the current time than the object below
-
-
Test versioning feature on Cloudfront
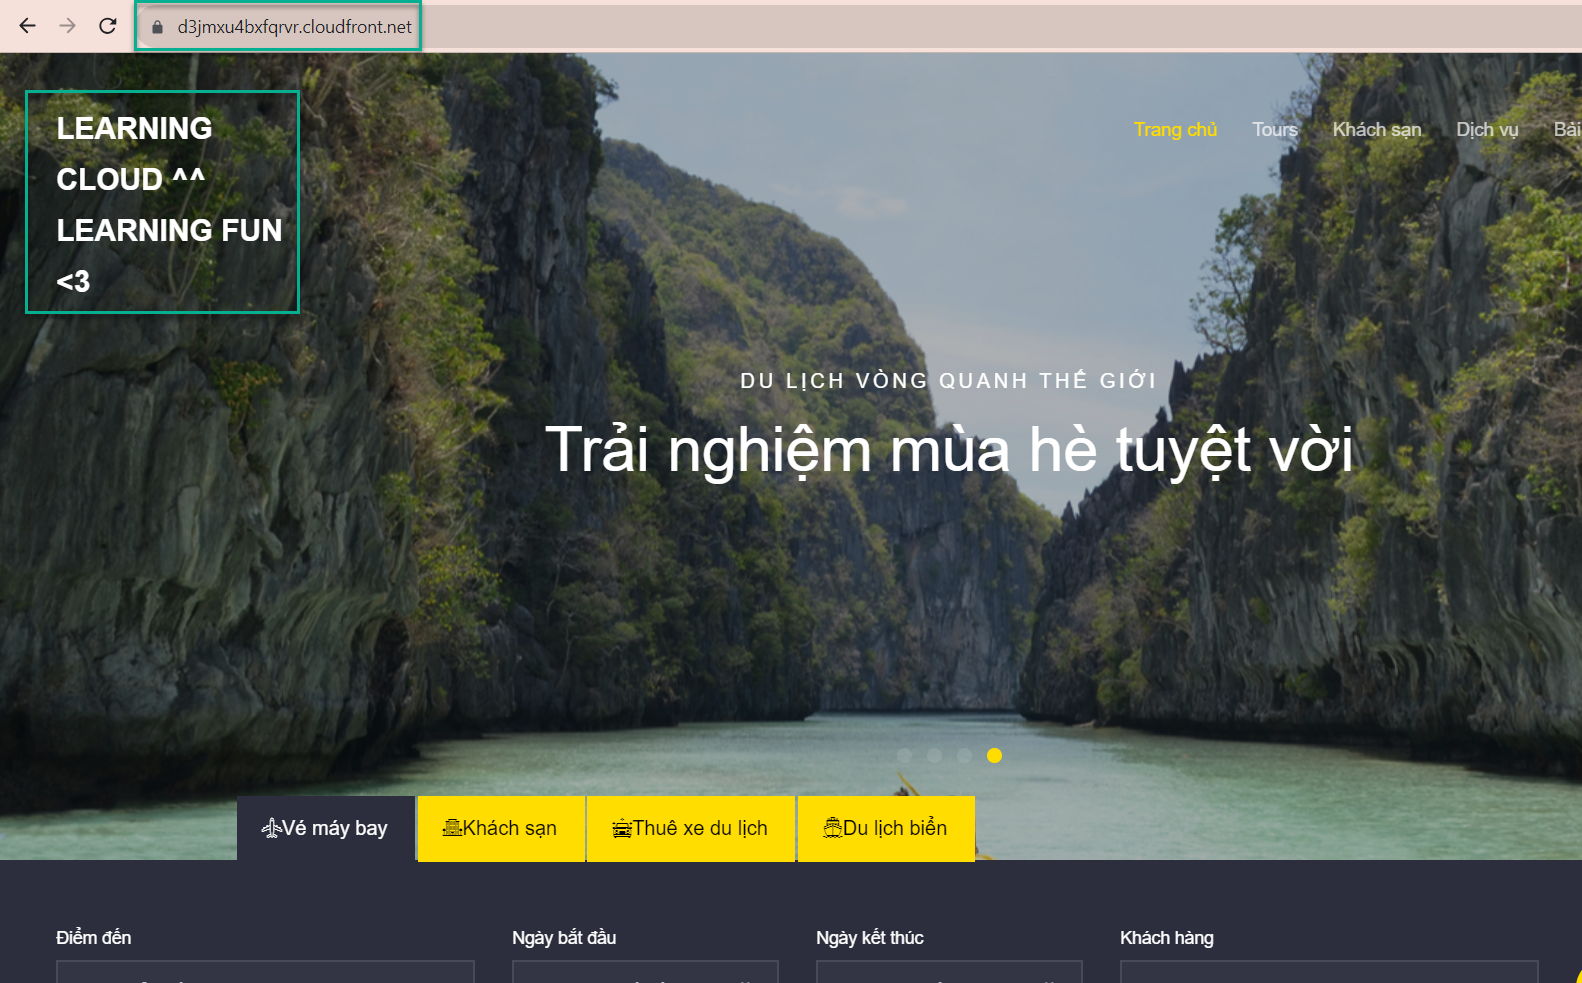
- In step 7.3 Check Amazon CloudFront, you accelerated your website with Cloudfront and performed a Distribution domain name check with content content: AWS FIRST CLOUD JOURNEY
-
So let’s see if the Default root object with the file
index.htmlhas just been uploaded to a lasted version on S3, will the content change corresponding to step 2 above? -
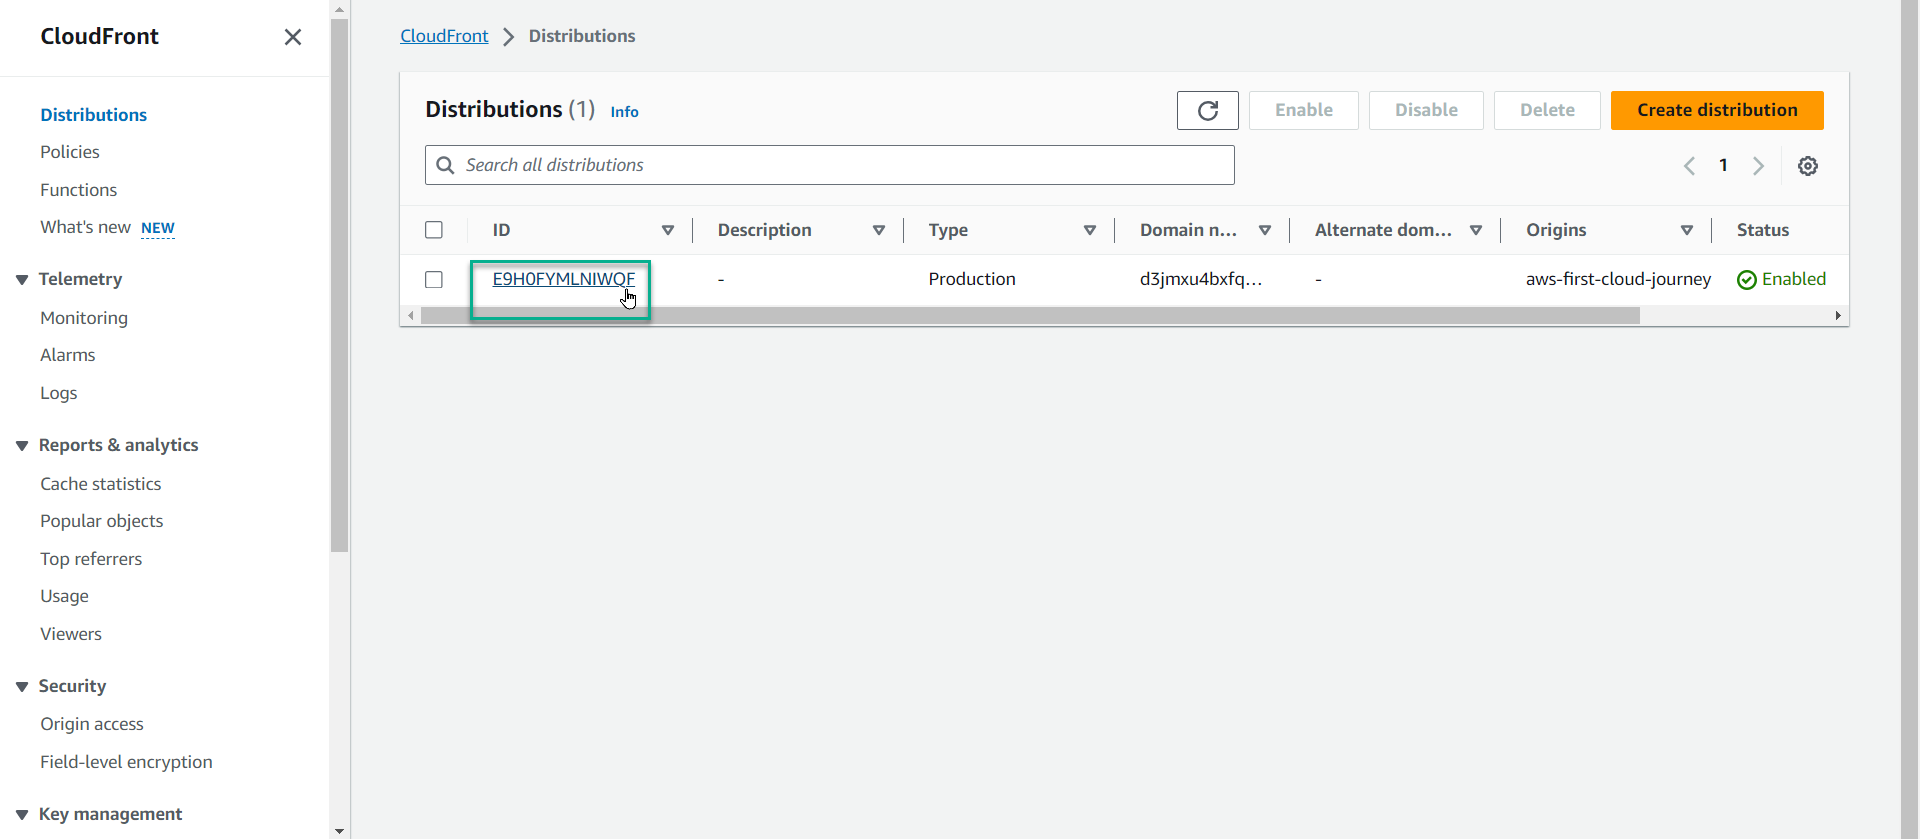
Open the Amazon CloudFront console at https://console.aws.amazon.com/cloudfront/home
-
Select current Distributions ID
- Select Behaviors, select the check mark, select Edit
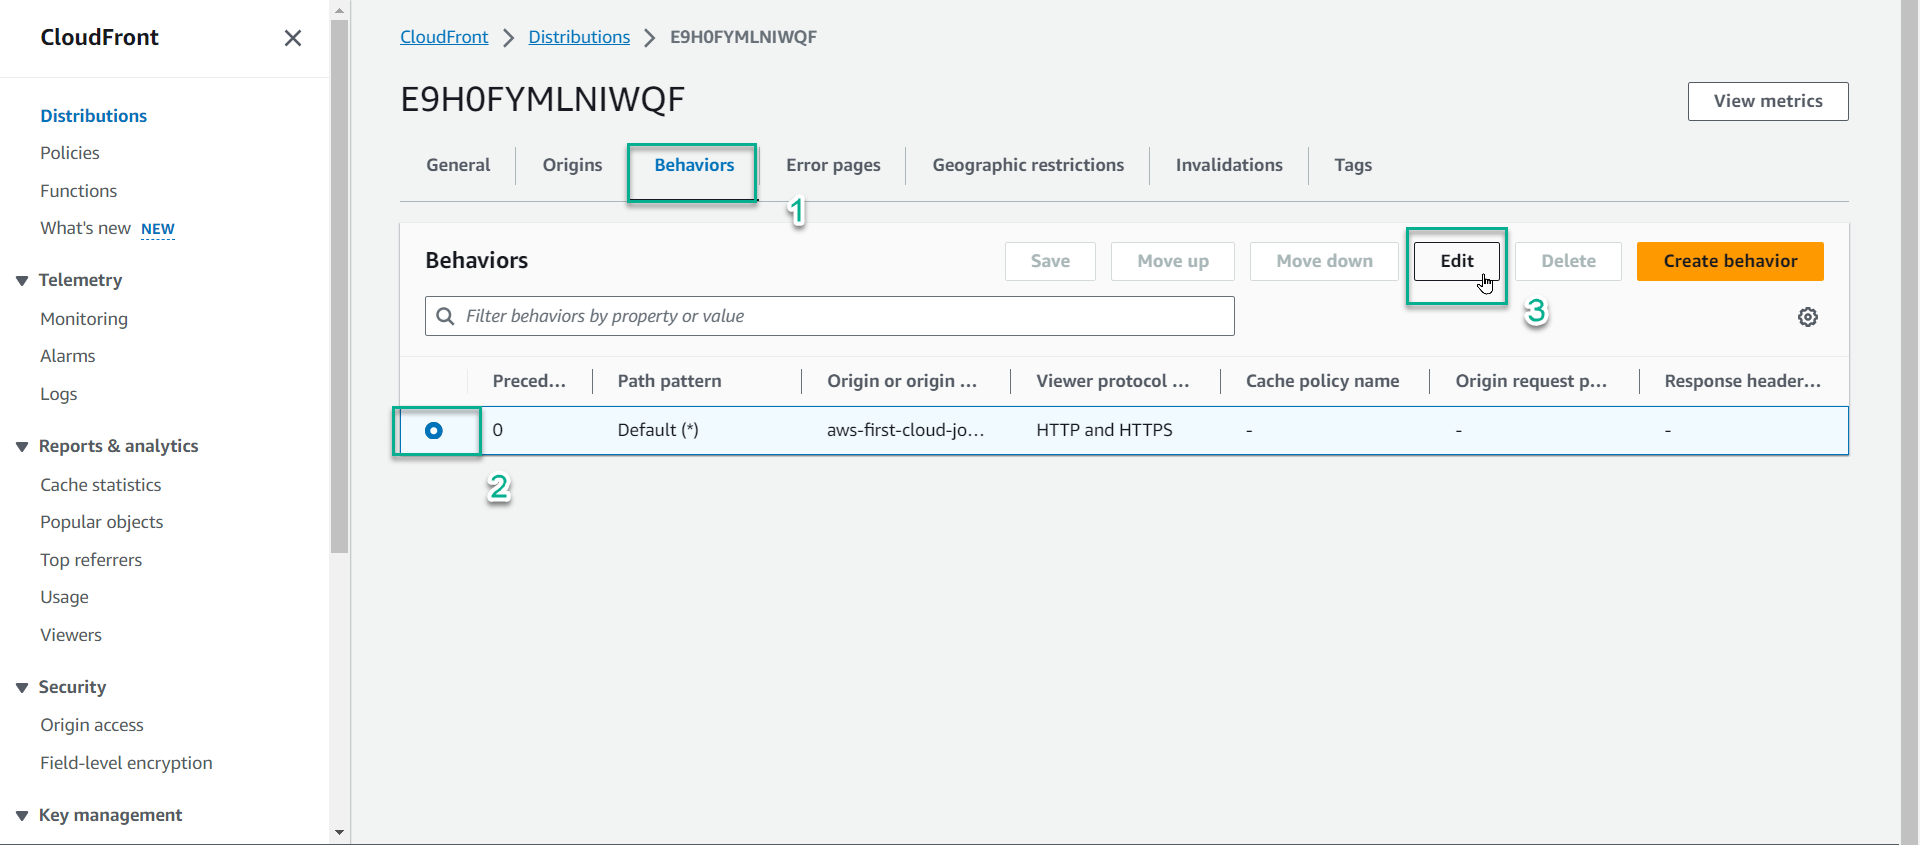
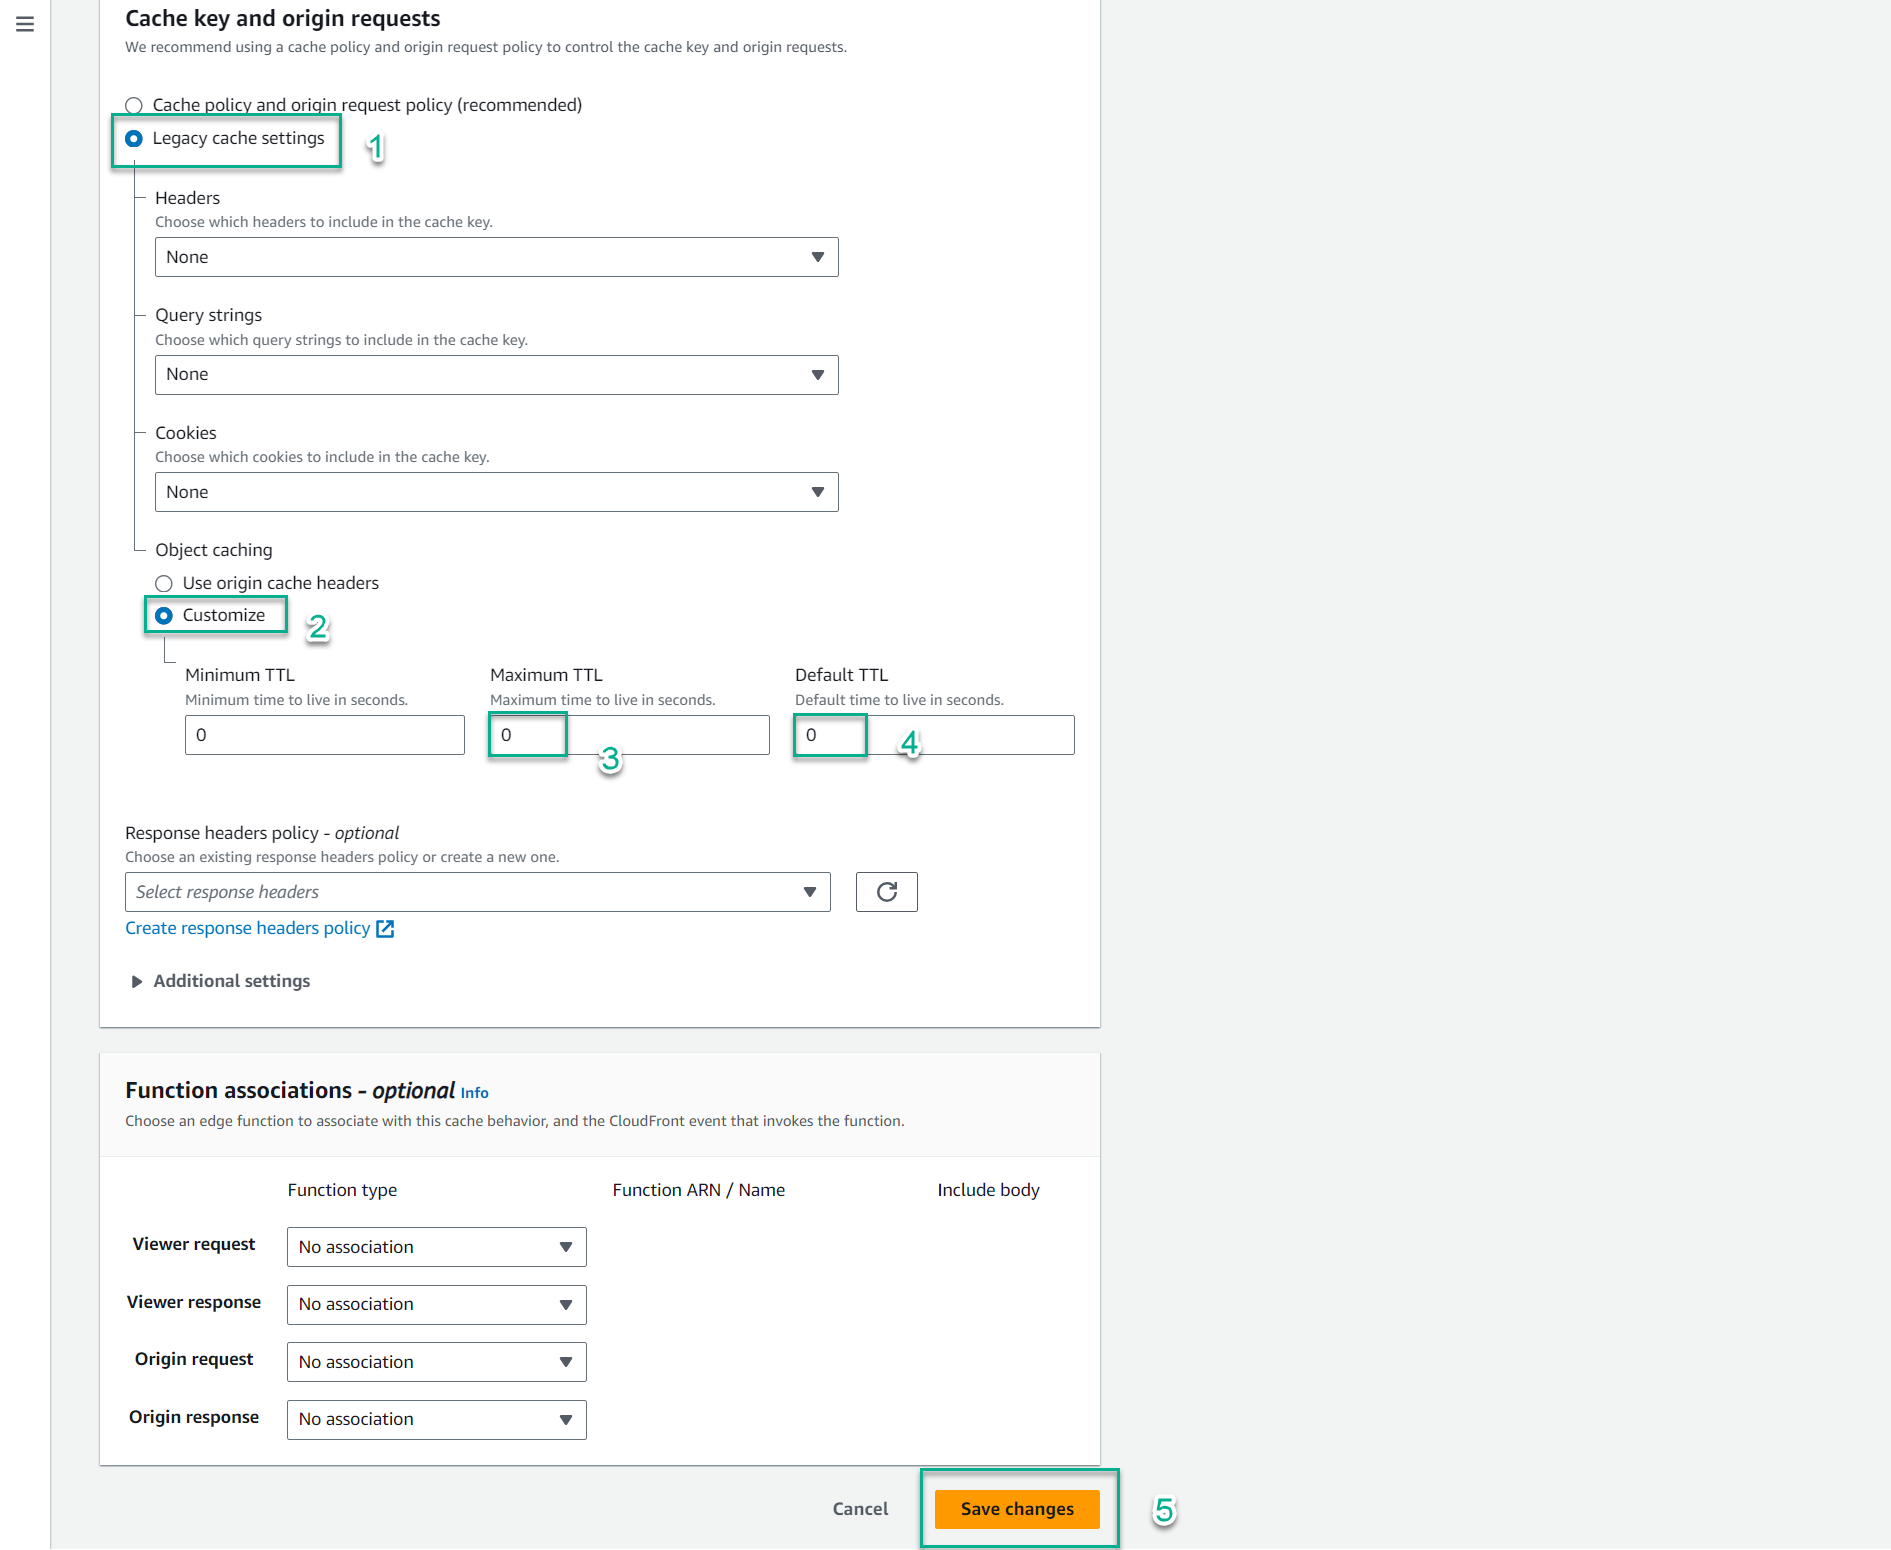
- At Cache key and origin requests, select Legacy cache settings
- In the Object caching section, select Customize
- In the Maximum TTL section, enter the new value:
1 - In the Default TTL section, enter the new value:
1 - Scroll to the bottom of the page, select Save changes
- -> This will help Cloudfront regularly update changes from S3 within the framework of this lab
- You need to wait a few minutes for the status to change from Deploying to the time of last modification

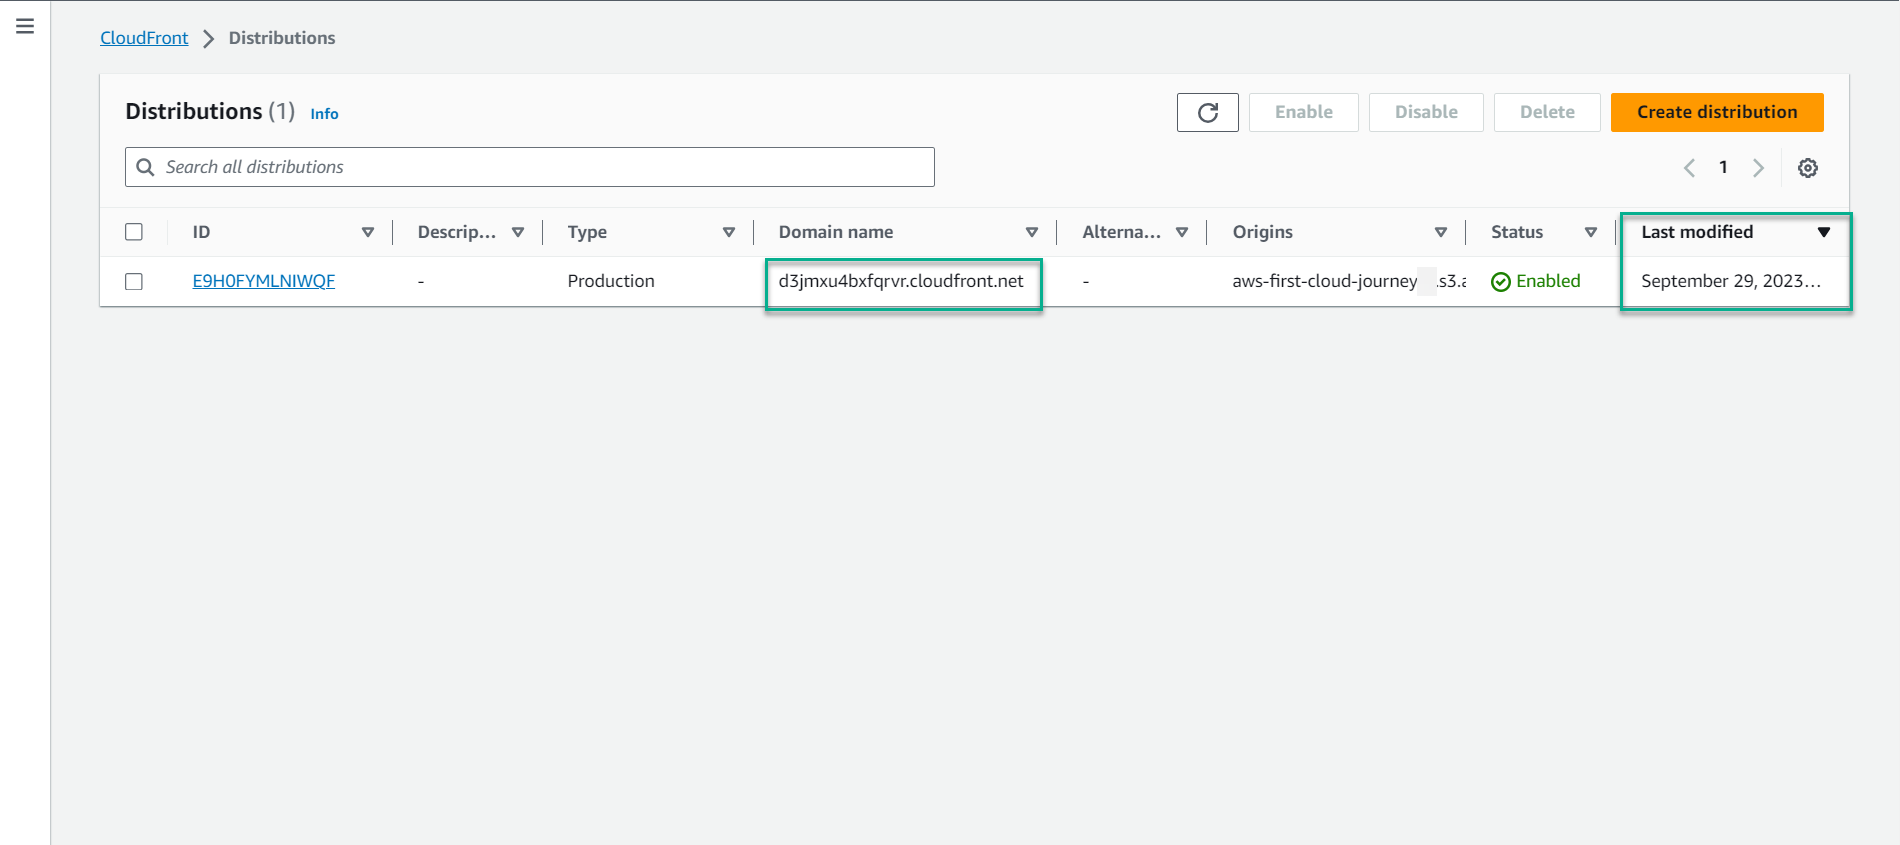
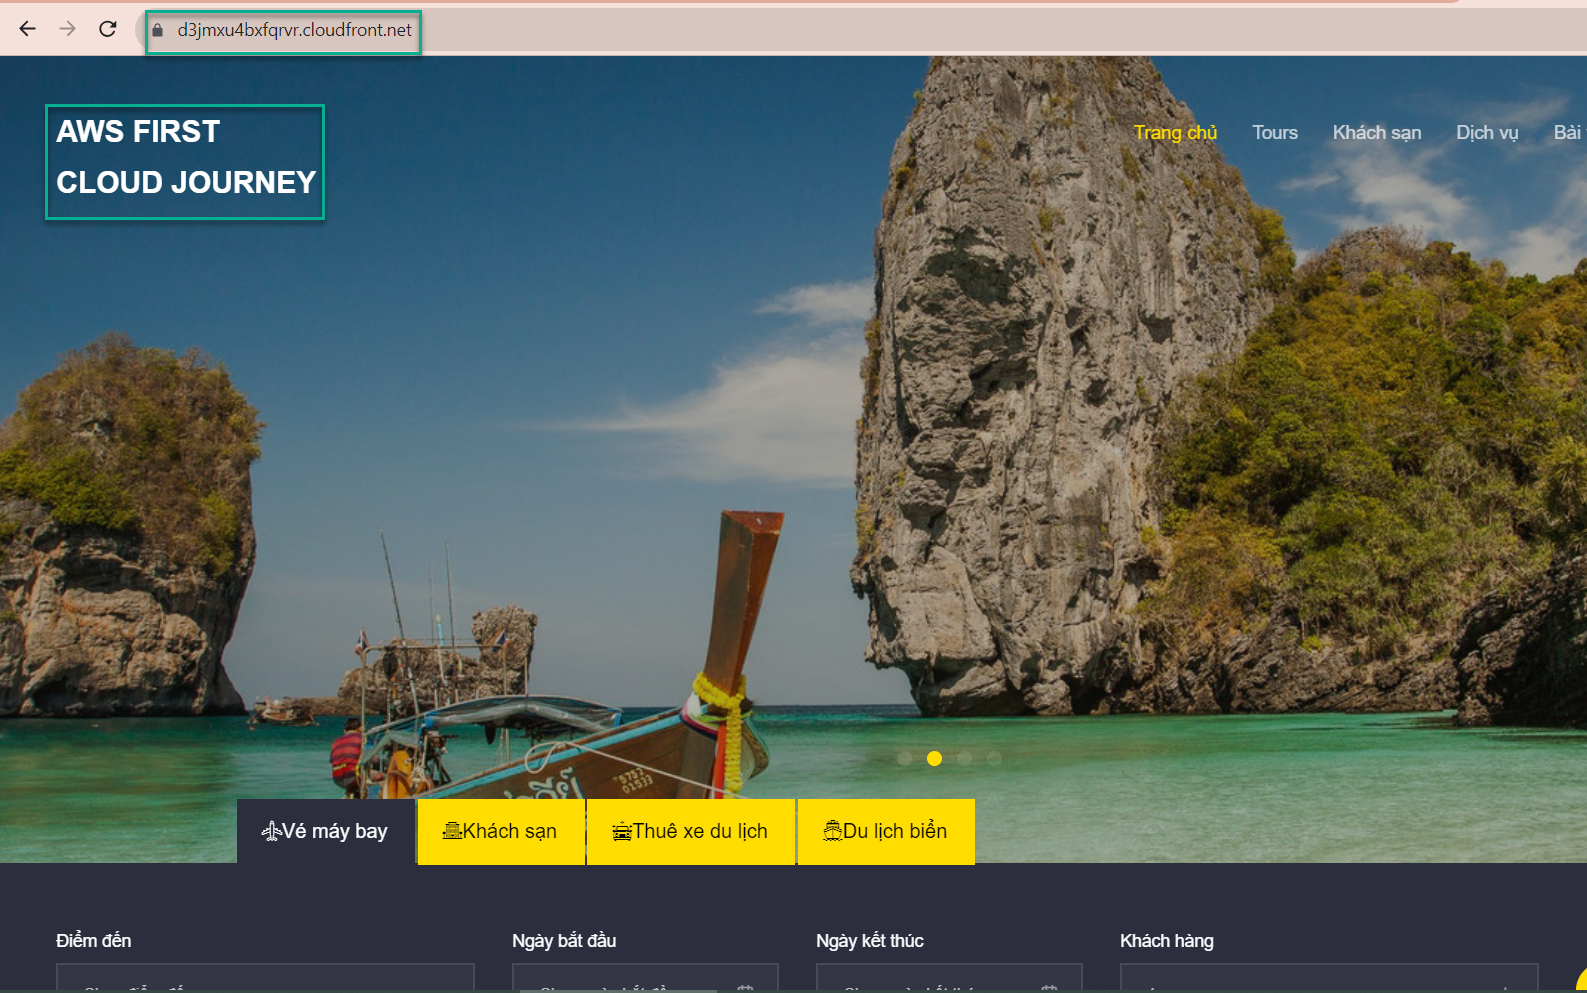
- Then, copy the Domain name into the browser to see the changed content
-
However, at this time, if you want to quickly restore the old content without having to edit the index.html file on your local machine - just delete the latest version object: index.html on S3 bucket
-
In the S3 bucket console aws-first-cloud-journey, in the search box - type
index.htmlthen enter, select Show versions.
- Check the box symbol at the top of the index.html object, select Delete
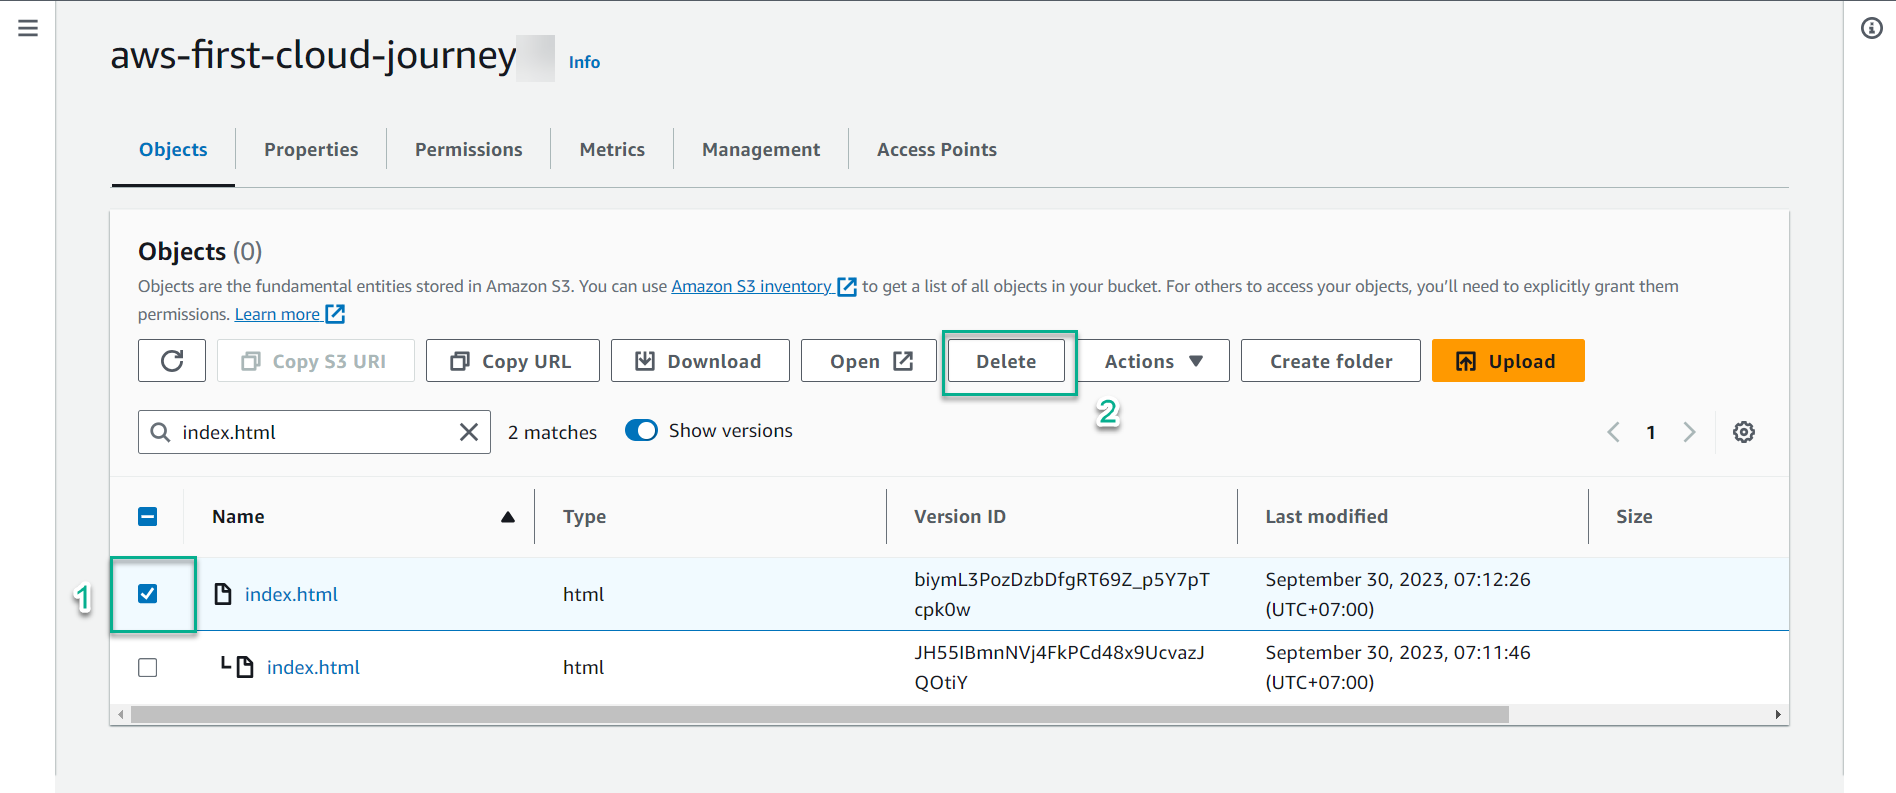
- Check the correct file to delete -> enter
permanently deletein the box -> select Delete objects

- At the browser page running CloudFront’s Domain name, press the F5 key to refresh the page, you will receive the old value: AWS FIRST CLOUD JOURNEY